Showing posts with label festive. Show all posts

Wednesday, 24 December 2014

Santa-standard baking!

Recipe: Festive mince pies & apricot bakewell tarts!

Time taken: About an hour

Ingredients: A jar of mincemeat, a jar of apricot jam, 400g plain flour, 320g butter, 180g caster sugar, 3 eggs, 40g ground almonds

Hi readers,
IT’S CHRISTMAS EVE!!!

This is when all the good stuff kicks off! It’s almost Christmasssssssss! Suddenly, we’re not saving all the food and drink anymore… we can freely hammer the kitchen and get bloody hammered!

I’m a little festive today. Literally, brimming with Christmas cheer! I’m perhaps on par, festive spirit-wise, with Buddy in Elf. And I’ve drunk a LOT of coffee. Plus, we went on a family outing this morning to see the new Hobbit film at the cinema… and it’s immense! Literally, it’s over two hours long and a good 50% of that time is made up of proper Middle Earth battle action!

Men with swords + elves with arrows + dwarves with axes = Orc massacre!! It’s a big blockbuster and definitely well matched to my excitement levels today. We even went 3D!  If you can make it to the cinema to see one more film this year: I thoroughly recommend the Hobbit.

Now I’m home and I’ve launched the Christmas playlist oncemore. You have to, really. Garland, Crosby, Rea… all the Christmas classics have been blasting this Christmas Eve. And me and the Mother Bear having been baking up a festive storm in the kitchen! We’ve been baking mince pies and apricot bakewell tarts (apricot as this is the only flavour of jam that my Mother Bear approves of) to feed to the men over Christmas! And OF COURSE they’re for us too. In fact, did we save the guys many? Any? Hmm…

Sooooo, I’m sharing the magic with you! To bake up your very own mince pies and bakewell tarts (fit for Father Christmas to taste tonight when he’s doing his rounds!) here’s what you do…

1. Heat your oven to 200˚C. Grease a 12-hole bun tin with a little butter. Crack open your Baileys!

2. Measure 375g flour and 260g butter into a large mixing bowl, and rub together with your fingertips until the mix resembles fine breadcrumbs.

3. Add 125g of sugar and 1 egg, and stir it up!

4. When it all starts to come together, use your hands to work the dough into a ball and then tip it out onto a lightly floured surface.

5. Roll the pastry out until it’s a few millimetres thick and then use a large round cutter (or, if you can't find it, a pint glass) to cut out 12 large pastry circles. Press these into each slot of your bun tin.

6. Next, fill 6 of these pastry cases with a teaspoon of mincemeat in each. Use a small round cutter to cut out 6 small circles from your remaining pastry. Pop these over your mincemeat-filled cases, and use your fingertips to press the lids down at the edges, so no mincemeat can bubble out when they are in the oven.

ChefBeHere Top Tip: I take a sharp knife now and score a couple of lines in the top of each lid. I think this is done so that some of the heat can get out of them in the oven. (???) It’s just a tradition, really.

7. Crack an egg into a mug and use a fork to beat it up into a yolky mix. Take a pastry brush and dip it into this mix, then brush over the top of your 6 mince pies. This is to glaze them and make them turn golden when they bake.

8. Clean your mixing bowl and measure into it: 55g butter, 55g sugar, 40g ground almonds and a tablespoon of flour. Crack an egg into the bowl and stir it all up! This is the frangipane mix for your bakewells.

9. Spread a little apricot jam in the bottom of your 6 empty pastry cases then  spoon frangipane over the top of this until the case is full. If you have any pastry left you might want to arrange it over the top in strips or festive shapes (like Christmas trees or holly leaves). Or you can sprinkle flaked almonds over the top, if you have any to hand. Or just leave them as they are.


10. Safely transport into the oven to bake for about 20 minutes. They should all turn golden on top and your bakewells might rise (although ours didn't much) and then they’re ready to come out! Leave your lovely pastries on the side to cool in their tin for half an hour, then transfer onto a plate. Dust with icing sugar (so they look like they’ve been out in the snow) and serve them up!

ChefBeHere Top Tip: Remember to save Father Christmas the bestest, biggest mince pie for when he visits tonight. This is of vital importance.
And here’s me and the Mother Bear’s baking while cooling

I’m quite proud of us, really! I’m literally shaking today with caffeine and Christmas excitement and my mum’s had a loooot of jobs she’s been working through this morning (really, it’s mad, she’s driven her Mr into work, been out Christmas food shopping, cleaned the house from top to bottom, worn the dog out on a big walk, given the bird’s cage a festive spruce, welcomed next door’s new born baby to the world… she’s a woman on a mission this Christmas Eve!) but we both got it together for some solid mother-daughter baking time today.
Fast forward a couple of decades... and we're still larking around together!

And, god, we did a good job! Our pastries taste like THE BOMB. Unbelievably, eating one of these mince pies just now, I realised it’s only my second one of the whole Christmas! And the first one was sadly shop bought (and eaten in sub-zero temperatures in an outdoor marquee following the CU Carol Service at uni… I could barely feel my lips at the time) so this was a far merrier mince pie experience! They taste incredible! Just pure butter and stodge and Christmas spirit. I love it!

So PLEASE go warm their hearts and treat your family. Bake them up a batch of Christmassy pies and tarts to munch over the next few days. They will love you more when you do. And OBVIOUSLY you can’t be leaving any shop bought fodder out for Father Christmas later! He’s going to be so busy tonight he needs the real deal! A proper homemade mince pie, please!

Readers, I wish you the best of luck in the kitchen baking up a storm. And here’s wishing you a very merry Christmas Day tomorrow! Have a warm, wonderful time with your family.

Take care this Christmas,

Hayley


Monday, 22 December 2014

APPLE BREAD FOR ALL


Recipe: Apple Bread with Raisins & Pecans

Time taken: An hour & a half

Ingredients: 2 apples, 1 lemon, 375g apple sauce, 125g gluten-free plain flour, 125g corn flour, 175g pitted dates, 150g pecan nuts, 100ml almond or soy milk, 75g raisins, 2 teaspoons of baking powder, 1 teaspoon of cinnamon, half a teaspoon of vanilla essence, & a pinch of salt


Hi readers,

G’day to you all! How is your day? Is it a good one? Today in Sheffield it’s not been bad. There is of course the oppressive cloud cover, and we’re being battered by strong winds. But it’s been colder. I’d say it’s been a good start to the new week. And if you’re reading this then you’re surviving Monday. So high five! And this week *drumroll* is the week *big drumroll* that it’s going to be Christmas!! Hurray! Need I remind you… it’s just THREE DAYS TO GOOOO! Whooooo!


Readers, I was thinking (it happens sometimes) about what you might like to read about next on the ChefBeHere blog. Everyone’s very busy at this time of year and I know you don’t have the minutes to spare to read any old recipe. And I was thinking about what might be of use to you.


And I was struck with an idea! I know one thing that a lot of people struggle with at this time of the year, when everyone’s coming together for Christmas, is catering for That Person. You know the one? The person on the special diet. There’s always one! In my family: it’s me. Vegetarian. I hold my hand up! I’m That Person who nobody knows how to feed. They’re like ’Can we put Quorn in a cheesecake?’ and ‘Is there meat in a scotch egg?’… Yes. No.


It’s a never ending struggle! And buffets are the worst. Unless your host has kindly labelled every dish, or taken the time to run you through what you can and can’t eat, you’re left inspecting pastries and peeling finger sandwiches apart to check the filling. Then you eat a suspicious spring roll and spend an hour crying in the bathroom.


And being vegetarian is hardly a special diet anymore! These days everyone knows at least one vegetarian and every supermarket has a special fridge and special freezer, set aside just for us. I feel for people with even more special diets than mine. Diets that friends and family definitely can’t be counted upon to understand. For you, walking up to a buffet must be like going into battle.


Soooo I decided to bake something special! Especially for those of you with special diets. Today I baked a VEGAN, GLUTEN-FREE, LACTOSE-FREE apple bread with pecans and raisins. That’s right. There is such a thing! And it tastes like a dream! So, I didn’t invent this. I needed a little help. This recipe is adapted and Britishised from one I found online, on a fantastic blog by Gluten-Free Vegan Girl (go check her out!) right here: http://www.gluten-free-vegan-girl.com/2014/02/apple-bread-with-raisins-pecans.html


So here’s how you go about making your very own very special apple bread, in just ten steps:

1.       Heat your oven to 200ᵒC.

2.       Prep your pecans! Chop the nuts into small pieces.


3.       Prep your dates! Again, chop them up small.


4.       Prep your apples! Core them, peel them alive and then chop them up into cubes.


5.       Add to one bowl your apple sauce, dates, milk, vanilla essence and the juice from your lemon. Stir this all up!


6.       In another bowl add both your flours, along with your baking powder, cinnamon and salt.


7.       Stir this flour mix into your apple mix.


ChefBeHere Top Tip: My mix began to froth quite alarmingly here. I powered on, hoping this was ok, and everything was fine. Just make sure you’re using a large mixing bowl so that your lively mix doesn’t have the chance to froth over the edges!

8.       Gently fold your apple chunks, raisins and pecans into your bread mix.


9.       Pour your finished mix into a loaf tin lined with baking paper.


10.   Safely transport into the oven and bake for 50-60 minutes, until the bread looks golden on top, your house smells like an orchard and a sharp knife jabbed into the middle of the bread comes out clean.

Fresh from the oven!

And that’s all there is to it! You just baked up (I presume) your first loaf of special apple bread. High five! Now, run a knife around the edge of your loaf to loosen it from the tin, then leave it to cool in the tin for about twenty minutes. After that, you can either transfer it to a Tupperware to finish cooling, or slice your loaf up and serve warm! Spread with butter or apple sauce, for a taste sensation.

Here’s my warm n gooey lunch…

This was such an exciting recipe to bake! We had half of the ingredients in the house already and the other half I found in Asda, on shelves I don’t usually notice, like the ‘Free From’ foods. Baking this bread involved lots of measuring and lots of chopping. Quite a lot of fretting over whether or not it was going right! And then a little hardship in peeling the baking paper away from the loaf at the end. But it was so worth it! 


This loaf is more a cake than a bread, really. It comes out very moist and sweet, and is packed full of fruit. The loaf is very moreish to eat. And tastes incredible! Super indulgent. And my favourite recipes are the ones where you can bung it in the oven for an hour while you have a hot drink, so this was perfect! No sieving or decoration or fuss. And, once again, having sampled a decent slice, I’m giving away most of my baking as gifts to friends when we meet up later tonight. So my loaf is all sliced up and Tupperwared, and ready for the off!

Packed and ready to go!


So, what do you think? If you aren’t coeliac or vegan or lactose intolerant, but you know someone who is, are you brave enough to give this a go for the next time that they visit? If you ARE on any of those diets, is this something you’d like to try to bake for yourself? Have you had anything like it in the past? And to anyone who’s had a crack at baking this, how did it go?? Success? New favourite recipe? Orrrr not so much? I’d love to know! And I hope that this helps some of out, maybe, when catering for That Person this Christmas. They’ll love you for trying, at least.


Everyone, bake safely and remember to watch those buffets!


Hayley


Saturday, 20 December 2014

It’s only mini! So I will eat thirty.


Recipe: Chocolate Orange Christmas Mini Muffins

Time Taken: An hour-ish

Ingredients: a Terry’s Chocolate Orange, 150g plain flour, a pinch of salt, a tablespoon of baking powder, an egg, 50g sugar, 50g butter, 120ml milk, and decoration :)

Evening readers!

Today issss… Well, it’s Saturday (The weekend! Dance around!) and it’s FIVE DAYS UNTIL CHRISTMAS. YEAHHHHHHH. I am more than A LITTLE excited now about Christmas. It’s been building and, today, I can confirm that I’m definitely excited. Officially. I’m in the festive spirit. And nothing will stop the song in my heart. Literally, I have sung all day. A medley of Christmas tunes. And some dance anthems thrown in to remind me of Newcastle. The hobs on the oven have been my discs. KITCHEN RAVE.


Though before I got down with the appliances, readers, I should report that the Christmas food shop was tackled this morning. There was a war waged between Morrison’s and my dad’s wallet. We made it out with not one trolley-related injury, high five! And we got EVERYTHING ON THE LIST. Possibly for the first year ever. And we got so much more, readers. We bought the shop. And it’s a joke because the kitchen here is so small we can’t even fit a microwave. So our arrival home, readers, was sort of a lesson in ‘How best to stack ten tins’ and ‘What’s safe to keep by the bleach’ and so on. There was a lot of “Christ, I knew we already had the parsnips!” and such. But we did it! And it’s all safely in the kitchen. Just about. THOUGH NOT FOR LONG. Muahahahahaha :D


And, once more, through my haze of festive cheer… I was inspired to bake! Today, I really wanted to get my bake on again. PLUS, I had an actual excuse to justify some baking. For once, a real reason why there was probable cause to bake! Such a rarity! See, tomorrow is another big present-swap family-meet-up function affair. This time for all of my dad’s girlfriend’s family brood. And I’m invited! I’m not really central to this clan, but I enjoy going along to their do’s. They’re a lovely bunch. So I’m going along and attending as my dapper dad’s plus one. And as I have no presents to hand out, I’ve baked some goodies for me to give out instead, for his girlfriend’s lovely family. :)


*Drumroll*… I’ve baked chocolate orange mini muffins, readers! Yes I have! I to-tally invented this recipe earlier, while feeling a little crazy, and it’s been a hazardous bake… but successful! With its many pitfalls, this was definitely one to share on the blog. I have to remind you all OCCASIONALLY that I’m not perfect in the kitchen. :P 


So, my original logic for this revolutionary recipe was:

1)      Even though it’s samey to yesterday’s baking (see my ‘Cookies from Darkest Peru’ blog post) I love chocolate orange flavours and we’ve got loads of Terry’s and shit in, so I definitely wanted to do something to involve them.
Who could say no?


2)      We have very few other ingredients in the house (the baking cupboard is also the cereal cupboard in my dad’s ridiculous kitchen).

There's about this much room in there

3)      In the kitchen, I discovered little gold and red candy cups, bought when making fudge last Christmas. How could I involve these?? Hmmm… AND SO MY RECIPE WAS BORN.

Some might say...

So, to rustle up tour own real life chocolate orange mini muffins CHEFBEHERE STYLE, here’s what you do…

1.       Heat your oven to 200ᵒC.

2.       Line a baking try with 30 or so candy cup cases.


3.       Measure your flour, baking powder and salt into a bowl.


4.       Heat your butter and a quarter of your Terry’s Chocolate Orange together in a saucepan until both are melted and mixed into chocolatey goo. Leave to cool.


5.       Measure your sugar into a large mixing bowl and crack your egg into this bowl.


6.       Chop up another quarter of your Terry’s Chocolate Orange, into small pieces.


7.       Add your melted butter mix to your egg’n’sugar bowl and stir it up!


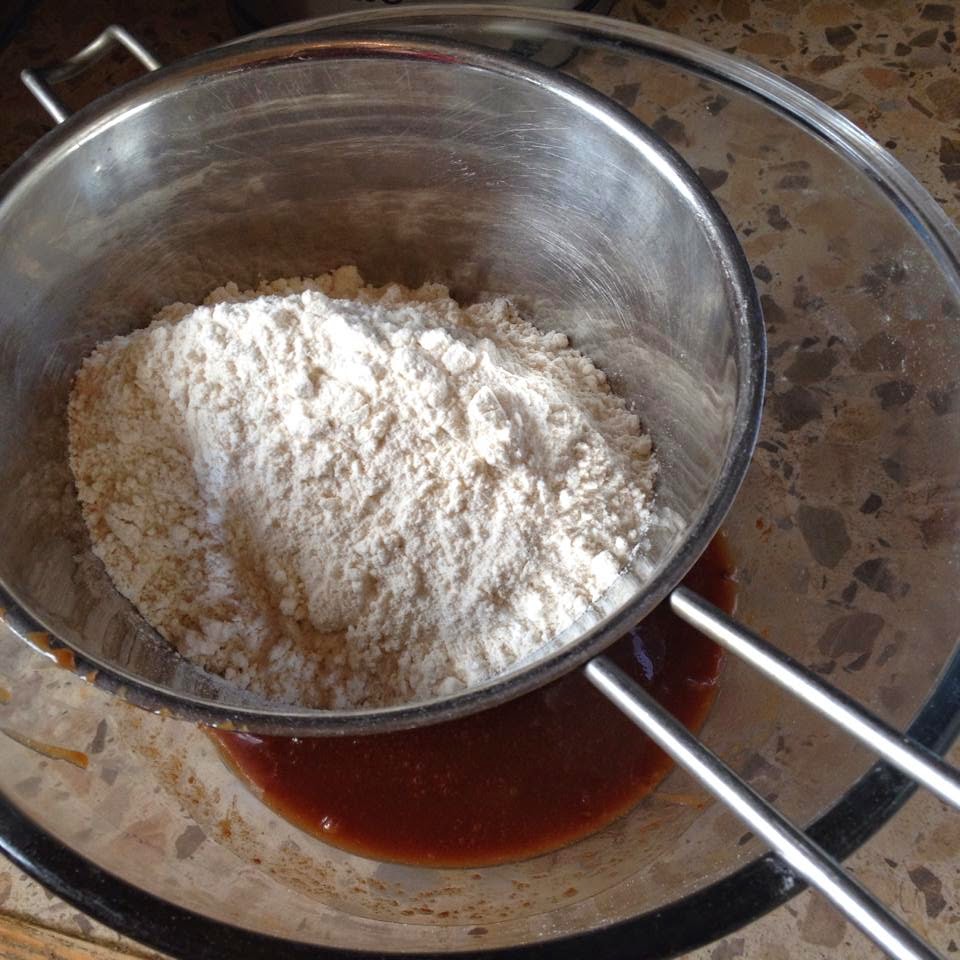
8.       Place a sieve over this bowl and sift your flour mix through your sieve, so that it lands gently onto the batter below. Let it snow, let it snow, let it snow!


9.       Pour your milk into this bowl and use a wooden spoon to fold everything together.


IS MAGICALLY TRANSFORMED INTOOOO...

10.   Add your chocolate chunks and stir in (I did forget, yes, and had to chuck the chunks over my mini muffins just before they went into the oven – DON’T BE A COTTON HEADED NINNY MUFFIN LIKE ME).

11.   Take a teaspoon and scoop a small amount of mix into each of the candy cups, so that they just aren’t quite full.


ChefBeHere Top Tip: I pretty much filled my candy cups with mix and then it went and rose a tremendous amount, overspilling some of them! So play it safe, and make more of them rather than exploding a smaller number. Put a little mix in and I GUARANTEE it will rise.

12.   Safely transport your mini muffins into the oven to bake for ten minutes. Get some dishes washed really quickly while they do. Go on.

13.   When your muffins have risen and turned golden brown, get those babies out of the oven!


14.   Rest them somewhere safe to cool (If any made muffin love in the oven and have become one, you should just be able to pull them apart using your hands while they’re warm).

15.   Melt the remaining half of your Terry’s chocolate orange, either in the microwave or in a bowl held over a saucepan of boiling water.

"I'm meltinggggggggggg!"

16.   Use a teaspoon to drizzle a little chocolate over each mini muffin.

17.   Before the chocolate has time to set again, sprinkle some kind of decoration on top!


ChefBeHere Top Tip: I deployed crumbled pieces of chocolate orange brownie for decoration today. If you aren’t lucky enough to have brownies in the kitchen to crumble, you could use those little sugared orange slices that come in tubs with lemon slices? Or you could whip out the chocolate sprinkles, perhaps? Or pop a chocolate button or a magic star on each mini muffin? You don’t need a lot as they’re so small, but it’s nice to do something to decorate. Especially if you’re giving these as gifts, like I am.

18.   You’re all done! If you’ve baked these for a Christmas party, arrange your mini muffins artistically on a platter and pop them out on the buffet or offer them around to guests. If you’re giving them as gifts (like me!), find some takeaway tubs out that will fit your mini muffins and design a bunch of playful tub labels, to remind people what it is you’ve baked for them when they’ve forgotten after a few drinks. If you’ve made these all for yourself, pick your most splendid-looking mini muffin to start with… and tuck in! Yolo.

Here’s my babies all ready in their boxes for tomorrow!

And here was the mini muffin saved just for me! I say 'was'...

And there you have it, readers. Another delightfully tempting and terribly indulgent bake. Straight from the ChefBeHere kitchen. This recipe was a little crazy along the way, and I know my mini muffins rose so much they didn’t come out looking tidy. And the eagle-eyed among you will have spotted that I stuck my brownie chunks on using writing icing in the end, having burned my melting chocolate in its pan. Again. I KNOW. I was too distracted with my singing! What’s a girl to do. But, despite ALL THAT… I think they’ve come out good!


Readers, I ate one: it tasted gorgeous. They look crazy but not… offputting?? Have you been put off by the photo them? I don’t think so. No! I think people will still want to put these in their mouths. I hope they will. Come on, they’re not that bad! They’re nottttt! THEY’RE MADE WITH LOVE. There you have it. And tomorrow I will be handing them over with love, and not worrying what people think of them. Because they aren’t. That. Bad.


I think this bake demonstrates, readers, that one key to a successful bake in the kitchen is just confidence. Approach your recipe with confidence, be confident that your baking you’ve produced is top-notch (it probably is!), hand it over like you owned it in the kitchen, hold your head high and as long as you aren’t poisoning anyone then all will be fine. At least you tried.


And you should! You should go try this recipe, readers. Go have a shot at it! Because when you’re not overfilling candy cups and forgetting about your chunks, then BURNING the bloody chocolate, you could be crafting some upstanding mini muffins, I believe.  So please, please, go try this recipe out and let me know how you get on. Can anyone make this work?? Can you bake some gold standard mini muffins using this recipe? Is the recipe still decent, despite all my song-related shenanigans in the kitchen? Ready. Set. BAAAKE! 

Sing (don’t singe) my superstars


And always be safe,

Hayley