Showing posts with label chocolate. Show all posts

Saturday, 20 December 2014

It’s only mini! So I will eat thirty.


Recipe: Chocolate Orange Christmas Mini Muffins

Time Taken: An hour-ish

Ingredients: a Terry’s Chocolate Orange, 150g plain flour, a pinch of salt, a tablespoon of baking powder, an egg, 50g sugar, 50g butter, 120ml milk, and decoration :)

Evening readers!

Today issss… Well, it’s Saturday (The weekend! Dance around!) and it’s FIVE DAYS UNTIL CHRISTMAS. YEAHHHHHHH. I am more than A LITTLE excited now about Christmas. It’s been building and, today, I can confirm that I’m definitely excited. Officially. I’m in the festive spirit. And nothing will stop the song in my heart. Literally, I have sung all day. A medley of Christmas tunes. And some dance anthems thrown in to remind me of Newcastle. The hobs on the oven have been my discs. KITCHEN RAVE.


Though before I got down with the appliances, readers, I should report that the Christmas food shop was tackled this morning. There was a war waged between Morrison’s and my dad’s wallet. We made it out with not one trolley-related injury, high five! And we got EVERYTHING ON THE LIST. Possibly for the first year ever. And we got so much more, readers. We bought the shop. And it’s a joke because the kitchen here is so small we can’t even fit a microwave. So our arrival home, readers, was sort of a lesson in ‘How best to stack ten tins’ and ‘What’s safe to keep by the bleach’ and so on. There was a lot of “Christ, I knew we already had the parsnips!” and such. But we did it! And it’s all safely in the kitchen. Just about. THOUGH NOT FOR LONG. Muahahahahaha :D


And, once more, through my haze of festive cheer… I was inspired to bake! Today, I really wanted to get my bake on again. PLUS, I had an actual excuse to justify some baking. For once, a real reason why there was probable cause to bake! Such a rarity! See, tomorrow is another big present-swap family-meet-up function affair. This time for all of my dad’s girlfriend’s family brood. And I’m invited! I’m not really central to this clan, but I enjoy going along to their do’s. They’re a lovely bunch. So I’m going along and attending as my dapper dad’s plus one. And as I have no presents to hand out, I’ve baked some goodies for me to give out instead, for his girlfriend’s lovely family. :)


*Drumroll*… I’ve baked chocolate orange mini muffins, readers! Yes I have! I to-tally invented this recipe earlier, while feeling a little crazy, and it’s been a hazardous bake… but successful! With its many pitfalls, this was definitely one to share on the blog. I have to remind you all OCCASIONALLY that I’m not perfect in the kitchen. :P 


So, my original logic for this revolutionary recipe was:

1)      Even though it’s samey to yesterday’s baking (see my ‘Cookies from Darkest Peru’ blog post) I love chocolate orange flavours and we’ve got loads of Terry’s and shit in, so I definitely wanted to do something to involve them.

Who could say no?


2)      We have very few other ingredients in the house (the baking cupboard is also the cereal cupboard in my dad’s ridiculous kitchen).

There's about this much room in there

3)      In the kitchen, I discovered little gold and red candy cups, bought when making fudge last Christmas. How could I involve these?? Hmmm… AND SO MY RECIPE WAS BORN.

Some might say...

So, to rustle up tour own real life chocolate orange mini muffins CHEFBEHERE STYLE, here’s what you do…

1.       Heat your oven to 200ᵒC.

2.       Line a baking try with 30 or so candy cup cases.


3.       Measure your flour, baking powder and salt into a bowl.


4.       Heat your butter and a quarter of your Terry’s Chocolate Orange together in a saucepan until both are melted and mixed into chocolatey goo. Leave to cool.


5.       Measure your sugar into a large mixing bowl and crack your egg into this bowl.


6.       Chop up another quarter of your Terry’s Chocolate Orange, into small pieces.


7.       Add your melted butter mix to your egg’n’sugar bowl and stir it up!


8.       Place a sieve over this bowl and sift your flour mix through your sieve, so that it lands gently onto the batter below. Let it snow, let it snow, let it snow!
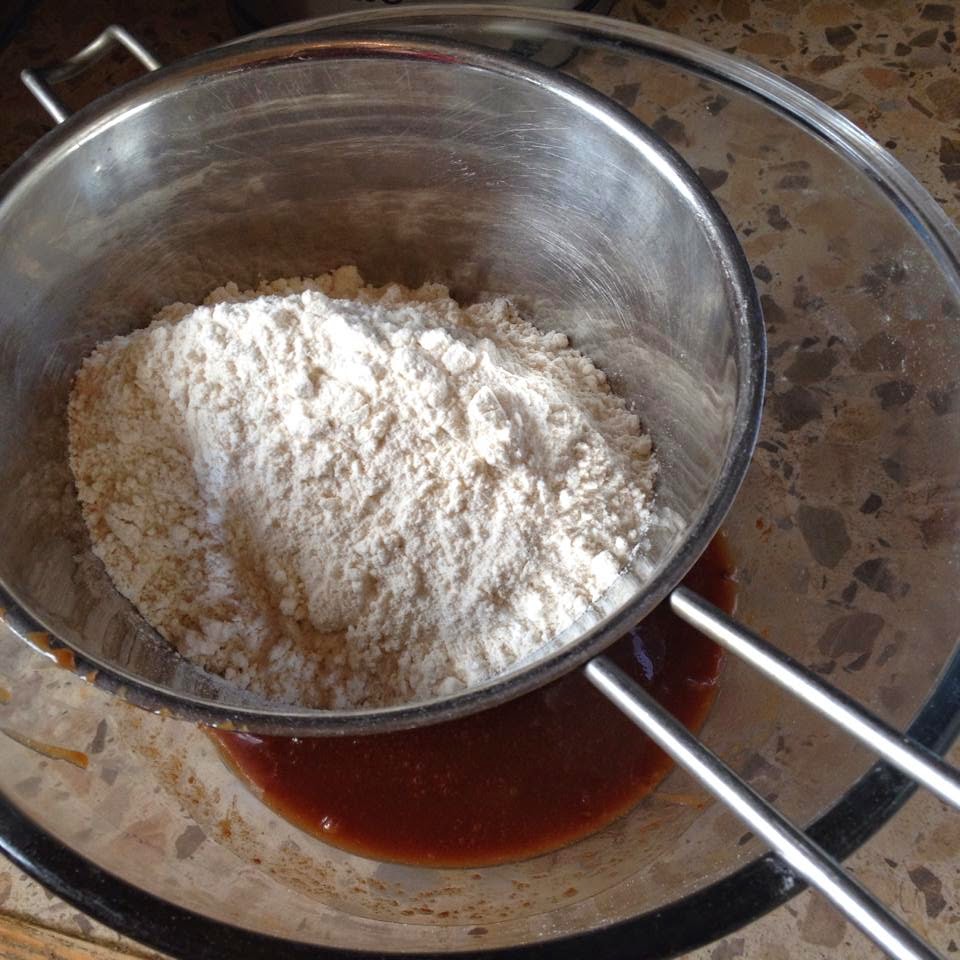

9.       Pour your milk into this bowl and use a wooden spoon to fold everything together.


IS MAGICALLY TRANSFORMED INTOOOO...

10.   Add your chocolate chunks and stir in (I did forget, yes, and had to chuck the chunks over my mini muffins just before they went into the oven – DON’T BE A COTTON HEADED NINNY MUFFIN LIKE ME).

11.   Take a teaspoon and scoop a small amount of mix into each of the candy cups, so that they just aren’t quite full.


ChefBeHere Top Tip: I pretty much filled my candy cups with mix and then it went and rose a tremendous amount, overspilling some of them! So play it safe, and make more of them rather than exploding a smaller number. Put a little mix in and I GUARANTEE it will rise.

12.   Safely transport your mini muffins into the oven to bake for ten minutes. Get some dishes washed really quickly while they do. Go on.

13.   When your muffins have risen and turned golden brown, get those babies out of the oven!


14.   Rest them somewhere safe to cool (If any made muffin love in the oven and have become one, you should just be able to pull them apart using your hands while they’re warm).

15.   Melt the remaining half of your Terry’s chocolate orange, either in the microwave or in a bowl held over a saucepan of boiling water.

"I'm meltinggggggggggg!"

16.   Use a teaspoon to drizzle a little chocolate over each mini muffin.

17.   Before the chocolate has time to set again, sprinkle some kind of decoration on top!


ChefBeHere Top Tip: I deployed crumbled pieces of chocolate orange brownie for decoration today. If you aren’t lucky enough to have brownies in the kitchen to crumble, you could use those little sugared orange slices that come in tubs with lemon slices? Or you could whip out the chocolate sprinkles, perhaps? Or pop a chocolate button or a magic star on each mini muffin? You don’t need a lot as they’re so small, but it’s nice to do something to decorate. Especially if you’re giving these as gifts, like I am.

18.   You’re all done! If you’ve baked these for a Christmas party, arrange your mini muffins artistically on a platter and pop them out on the buffet or offer them around to guests. If you’re giving them as gifts (like me!), find some takeaway tubs out that will fit your mini muffins and design a bunch of playful tub labels, to remind people what it is you’ve baked for them when they’ve forgotten after a few drinks. If you’ve made these all for yourself, pick your most splendid-looking mini muffin to start with… and tuck in! Yolo.

Here’s my babies all ready in their boxes for tomorrow!

And here was the mini muffin saved just for me! I say 'was'...

And there you have it, readers. Another delightfully tempting and terribly indulgent bake. Straight from the ChefBeHere kitchen. This recipe was a little crazy along the way, and I know my mini muffins rose so much they didn’t come out looking tidy. And the eagle-eyed among you will have spotted that I stuck my brownie chunks on using writing icing in the end, having burned my melting chocolate in its pan. Again. I KNOW. I was too distracted with my singing! What’s a girl to do. But, despite ALL THAT… I think they’ve come out good!


Readers, I ate one: it tasted gorgeous. They look crazy but not… offputting?? Have you been put off by the photo them? I don’t think so. No! I think people will still want to put these in their mouths. I hope they will. Come on, they’re not that bad! They’re nottttt! THEY’RE MADE WITH LOVE. There you have it. And tomorrow I will be handing them over with love, and not worrying what people think of them. Because they aren’t. That. Bad.


I think this bake demonstrates, readers, that one key to a successful bake in the kitchen is just confidence. Approach your recipe with confidence, be confident that your baking you’ve produced is top-notch (it probably is!), hand it over like you owned it in the kitchen, hold your head high and as long as you aren’t poisoning anyone then all will be fine. At least you tried.


And you should! You should go try this recipe, readers. Go have a shot at it! Because when you’re not overfilling candy cups and forgetting about your chunks, then BURNING the bloody chocolate, you could be crafting some upstanding mini muffins, I believe.  So please, please, go try this recipe out and let me know how you get on. Can anyone make this work?? Can you bake some gold standard mini muffins using this recipe? Is the recipe still decent, despite all my song-related shenanigans in the kitchen? Ready. Set. BAAAKE! 

Sing (don’t singe) my superstars


And always be safe,

Hayley


Friday, 19 December 2014

COOKIES FROM DARKEST PERU

Recipe: Chocolate Marmalade Cookies

Time Taken: Three quarters of an hour

Ingredients: 150g butter, 80g sugar, 1 egg, 6 tablespoons marmalade, 250g plain flour, 1 ½ teaspoons baking powder, 75g plain chocolate & a Terry’s chocolate orange

Here’s the ingredients minus the choc sorry
(it was otherwise engaged)

Evening readers,

Today, it’s Friday! And I know for a lot of you out there it’s been your last day of work before Christmas!! Well done! You’re finished! Hurrayyyyy! You can OFFICIALLY kick off your shoes and put on your Christmas jumper. Get yourself a tin of biscuits and the TV remote. Shout someone to pour you a Bailey’s… then go get it yourself. Back to the settee and park! That’s it: you’re in position for Christmas!!


It’s bliss! Give it a week or so and you might be where I am with festivities. That is, setting an alarm for NO REASON in the morning. Literally, just so you’re awake to see the morning for a change. That’s what I did today! And it wasn’t half bad, readers. I went for a waaaalk, I caught Lorraaaaine, I wrote out all my deadline dates! It was a slight improvement on being on bed. I think.

The view this morning!

Anyway, this afternoon I started googling recipes with marmalade in them. My mum’s been requesting some marmalade-themed baking since we went to see the new Paddington Bear film together last weekend! And it’s a whole world! There’s so many recipes to go at! I’ve never really eaten marmalade before and it’s not something I keep in my cupboards, but I’m definitely game for trying it out in some new baking.


And this started today! The recipe I chose online in the end was a simple one for marmalade cookies. Everyone’s in grazing-mode at home and I thought a cookie would be something small enough for people to snack on. And I had a cool idea for how to decorate them! Terry’s Chocolate Oranges are on offer at the moment at our corner shop and I had the idea to use the chocolate segments to put on top of my cookies. Because everyone loves Terry’s… especially me!


Here’s how to bake up your own Chocolate Marmalade Cookies…

1.       Heat your oven to 200ᵒC.

2.       Line 3 baking trays with greaseproof paper.


3.       Measure your butter and sugar into a mixing bowl, and cream together with a wooden spoon.


4.       Spoon your marmalade and crack your egg into the bowl. Stir it up!


5.       Measure out your flour and baking powder. Stir half into the mix, then add the other half and stir again… until you have thick, smooth cookie dough.


6.       Use a tablespoon to dollop your mix out on the baking sheets.


7.       Then, use the back of a teaspoon to smooth your balls of dough into cookie shapes.

8.       Bake in the oven for ten minutes!

ChefBeHere Top Tip: I forgot about mine ENTIRELY. I left them in the oven waaaay too long. As a result, they went black around the edges and stuck to the baking paper. No joke. I had to try to CHISEL them off. Many were lost. Don’t do this.

9.       Leave your cookies to cool. Meanwhile, separate the segments of a Terry’s chocolate orange.


10.   Melt your chocolate in the microwave (or over boiling water on a hob if, like my dad, you still haven’t bought a microwave) and decorate your cookies with it! Pop an orange segment on top of each cookie to finish them off.

Here’s how they came out!!

In the end, I think I finished about 16 cookies, but if you don’t weld them to the paper like I did you could stand to bake a good 20-24. I recommend spacing them so there are only about 6 to a tray maybe, because I tried to get 8 on a tray and some of my cookies got more than friendly. There was some merging and mingling of cookies in the oven. It was a hotbed for cookie baby-making action.


Even though my cookies are sort of “made with love” (Read: They went tits up!), these babies still taste bloody good! I was eating all the non-burnt broken pieces as I decorated the good ones and I can vouch for the orangey, buttery flavour of this recipe. These cookies are really festive! And I fail to see how chocolate on top can have made them worse. So, they’re sort of a success?? Not in the way I’d imagined, but still! These cookies are, somehow, decent!


So have a go!! Don’t burn them like me and don’t stick them to the paper, and you’ll possibly have made the best cookies ever! I’m sure Paddington Bear would think so, anyway. And you’d have to leave your lovely, warm Christmassy home to go buy proper cookies from the shop, so why not stay in and have a try at making your own?? This was a fun bake and I hope some of you are inspired to take it on. Spreading the fun. Plus, I know you can do better than me! I believe! Go cookie-fy your kitchen this Christmas.


Bake safely squirts,


Hayley


Wednesday, 10 December 2014

YULE LOVE IT

Recipe: Festive Yule Log

Time taken: 2 hours maybe (including the hour break in the middle)
Ingredients: 4 free range eggs, 100g caster sugar, 60 g self-raising flour, 40g cocoa, 600ml (a pint) of double cream), 300g dark/plain chocolate (same thing), a little icing sugar, a little butter and festive decorations.

Hi readers,
If I’m honest I’m losing track of which day of the week it is. I just had to check using the pop-up calendar in the corner of my computer screen. How ridiculous! It’s Wednesday. OBVIOUSLY it’s Wednesday. Get a grip. Somebody slap me in the face.

I think it’s so hard to even tell the day of the week because I’m so entirely surrounded by Christmas. Little else has any meaning these days. Two days ago? Geography Society Christmas Meal (which was a total blast – wine by the bottle and outrageous dancing in Flares!). Yesterday? Flat Christmas (again a blast – we carried off the cooking and had a major quiz-off). Tonight? Christmas Meal with a bunch of the geography girls to include those who couldn’t come to the official meal (at Fat Hippo – I can’t WAIT). The day after? Christmas manicure and a gig with my friend, Woody. The day after that? DRIVING HOME FOR CHRISTMAS.

So really, when measuring the days this way, it’s not shocking that I don’t know the actual day of the week. But it is still ridiculous. Anyway, yesterday I found time to make it back into the kitchen, readers! As a vegetarian, I didn’t play a major role in the Flat Christmas dinner prep. Largely, I was in charge of chopping veg here and there. And I set the table and crafted handmade placemats. AND BAKED THE YULE LOG!

That’s right! One of my flatmates took charge of Dessert Option A (bread n butter pudding) and Dessert Option B was all for me to take care of!! What a responsibility! I actually got really concerned about this. But it the end it went shockingly to plan and I managed to muddle together a pretty decent yule log, readers. I followed a Mary Berry recipe the whole way and it did me proud.

Here’s the one just for you (slightly simplified for student readers)…

1.       Heat your oven to 200˚C.

2.       Using some kitchen roll, grease a rectangular cake tine with butter.

3.       Line the tin with baking paper.
 
ChefBeHere Top Tip: I’d run out of baking paper so I used tin foil instead and, luckily, this worked fine! Maybe don’t use clingfilm though, as I imagine this melts in the oven.

4.       Crack your eggs and measure your sugar into a mixing bowl.

5.       Use an electric hand whisk to whisk these together, until the mixture is pale, light and frothy.

6.       Measure your flour and cocoa into a sieve together.

7.       Shake so that these delicately fall over your egg mix.

8.       Use a spatula to fold the flour mix into the egg mix, until they’re full incorporated and you have a chocolatey goo.
 
ChefBeHere Top Tip: Be careful when folding not to knock the air out of your mix. If you do this, it won’t rise very much in the oven. A terrible shame.

9.       Carefully pour the cake mix into your lined tin. Tip the tin around so that the mix spreads evenly to every corner.

10.   Carefully transport your tin into the oven and leave to bake for 8-10 minutes.
 
ChefBeHere Top Tip: Keep checking on your sponge and maybe switch the tin around after 5 minutes so it faces the other way, you don’t want any part of your sponge to burn!

11.   Meanwhile, lay a piece of baking paper on your work surface that is bigger than the size of the cake tin. Rather than baking paper I used foil again. And it worked again. I also hear you can use a clean tea towel.
 
12.   Use your sieve to dust icing sugar over your baking paper/replacement-item.

13.   When your cake is well risen, firm to touch, it springs back when you poke it and it’s shrinking away from the edges of the tin, take it out of the oven.

14.   Run a sharp knife around its edges, to make sure the cake isn’t stuck to the tin.

15.   Tip your tin upside down over your baking paper, so that the cake falls out onto the icing sugar below.

16.   Remove the baking paper stuck to your cake, which had been lining the cake tin.

17.   Along a long edge of your cake, use a sharp knife to core a little line along the length of the cake, an inch away from its edge.
 
ChefBeHere Top Tip: Don’t cut this bit of the cake off, just draw a line with your knife. Try not to go too deep into the cake with the knife. It should still be attached.

18.   Starting at this edge, tightly roll up the sponge with the paper inside it.

19.   Sit the roll on its outside edge and leave to cool completely (mine took an hour or so).

20.   Meanwhile, heat half of your cream in a pan.

21.   Break your chocolate up into squares.

22.   When the cream is reasonably warm, remove it from the heat and add your chocolate. Stir it all in until the chocolate is melted and you have a chocolate-coloured goo.

23.   Pour this into a bowl and leave in the fridge to cool and firm up. This will be the outer coating of your yule log.

24.   Pour the other half of the cream into a mixing bowl. Use an electric hand whisk to whip the cream.
 
ChefBeHere Top Tip: The aim here is to make your cream a solid, like squirty cream. It takes about ten minutes. You know it’s ready when the cream stands of its own accord in stiff peaks. Don’t over-whip. Keep an eye on it.

25.   Pop this in the fridge to keep cool. Go chill for a while.

26.   When your swiss roll feels TOTALLY COOL you can uncurl it and spread the whipped cream evenly over the top.
 
ChefBeHere Top Tip: I didn’t use all the cream. Some was felt over. I kept this in the fridge for eating with the yule log when it was served later in the evening. Handy.

27.   Re-roll your swiss role tightly, this time without the paper.

28.   Cover it entirely, really thickly, with the chocolate ganache topping that you have in the fridge. Coat the whole log with it.

29.   Run a fork along your yule log to make lines in the ganache, so it looks like proper bark.

30.   Cut a quarter of the length of the yule log off, diagonally not straight.

31.   Transfer your bigger piece of cake onto a serving plate or presentation board.
 
ChefBehere Top Tip: I made my own by covering a chopping board in foil.

32.   Angle your small piece next to the bigger one, so that it looks like a branch.

33.   Decorate your cake! This can mean just dusting some icing sugar on it like snow. Or I had holly and berry sprinkles to use. Or you can adorn it with fresh holly or a little plastic robin, maybe. Get creative.

And that’s it! In just 33 steps (it’s a mammoth recipe, I know) you’ve made yourself a yule log!! Well done! Here’s my baby from yesterday… part branch, part revolver...

 
Isn’t it amazing?? What do you think? I was pretty proud of my work, I have to say. And my flatmates were so lovely when they tasted it! Lots of compliments about my baking. :) It was a lovely end to a very special Flat Christmas. Eating our yule log. I wholly recommend this recipe. Mary Berry never lets me down and her yule log definitely has the X factor! Go give it a try this December. And let me know how yours come out! You’ll be fine I promise. Ready, set, BAKE!

Roll safely kids,

Hayley


Sunday, 7 December 2014

A treat for snowy times to come!

Recipe: Nutella n Nana Wrapz

Time taken: Quarter of an hour

Ingredients: 2 tortillas, 2 bananas and a large amount of Nutella

Hi Readers,
THEY’VE FORECAST SNOW! Snowwwwww! S. N. O. W.  Snow! Christ knows when, but baby it’s cold outside and it’s going to snowwwwwwww! This makes me so happy.
 
Readers, today is a good day. It’s a day of small achievements. What have you been achieving today? Give it a think. I bet you’ve achieved more than you think. My small achievements have been: I cleaned the bathroom, I went for an icy jog, I washed and dried my hair WITHOUT setting off the smoke alarm, I ventured out to buy the house festive some loo roll, I spoke to my mum, and I made a spectacular lunch.
 
What ho? Spectacular lunch, did she say? That’s right, readers! Today I had a top effort in the kitchen at lunchtime and produced something ace for once! Like most students, I’m on a mission to use up lots of ingredients I have left in my cupboard, before I head home at the end of the week. So today I was using up some tortilla wraps.
Here’s how they met their end…
1. I took a couple of bananas and sliced them up into little pieces.
 
2. I laid a tortilla on a plate and spread Nutella over it.
 
3. I arranged some banana slices at the edge of the tortilla then rolled the tortilla over them.
 
4. I repeated this a couple more times, until my tortilla was all rolled up into a wrap.
5. I did this all again with my second tortilla.
6. I made sure my banana was tightly and securely wrapped inside each tortilla and laid them on our George Foreman grill.
 
ChefBeHere Top Tip: Use your regular grill if you don’t have a wondrous George Foreman.
7. I put the lid down and turned our grill on, and left it for 5 minutes.
8. I did the dishes. Dancing is essential.
9. I dunked the leftover banana pieces in Nutella and ate them up (greedy move).
 
10. I plated up my warm wraps and tucked in!
Here’s how they came out!
 
They tasted… goooooood. Mightily good readers. I might suggest that 2 wraps for one person is A LITTLE MUCH. And potentially migraine-inducing. But I was so busy enjoying these that it was hard to tell. This is a SUPER INDULGENT lunch. Literally, any month other than December and you’d be too disgusted with yourself to finish. So get going and make some while it’s still December! If you’ve had a go at making these, whadaya think? A choctastic taste sensation?? Erm… AGREED.

Wrap it up readerz,
Hayley