Showing posts with label dessert. Show all posts

Wednesday, 17 December 2014

CHOC-NAN-ICOT... WHAT?

Recipe: Chocnanicot Muffins, I call them

Time Taken: 1 hour

Ingredients: 150g marg, 250g sugar,3 eggs, a teaspoon of vanilla extract, 2 ripe bananas, 250g plain flour, 2 teaspoons of baking powder, 125g ground almonds, 150g dried apricots, 150g plain chocolate aaaaand either one big chocolate cookie or a few small cookies
 
 Hi readers,

Today, it’s Wednesday! It’s another day in the big run up to Christmas. For me, another day of general laziness and festive cheer. You can’t begrudge me this, readers, because after I graduate in June I’m probably going to be working for the next 50 years of my life. And some of those years I might have to work on Christmas Day! The horror! So I’m allowed one last good Christmas. And I hope, whether working or not, you’re having a good Christmas season, too. :)
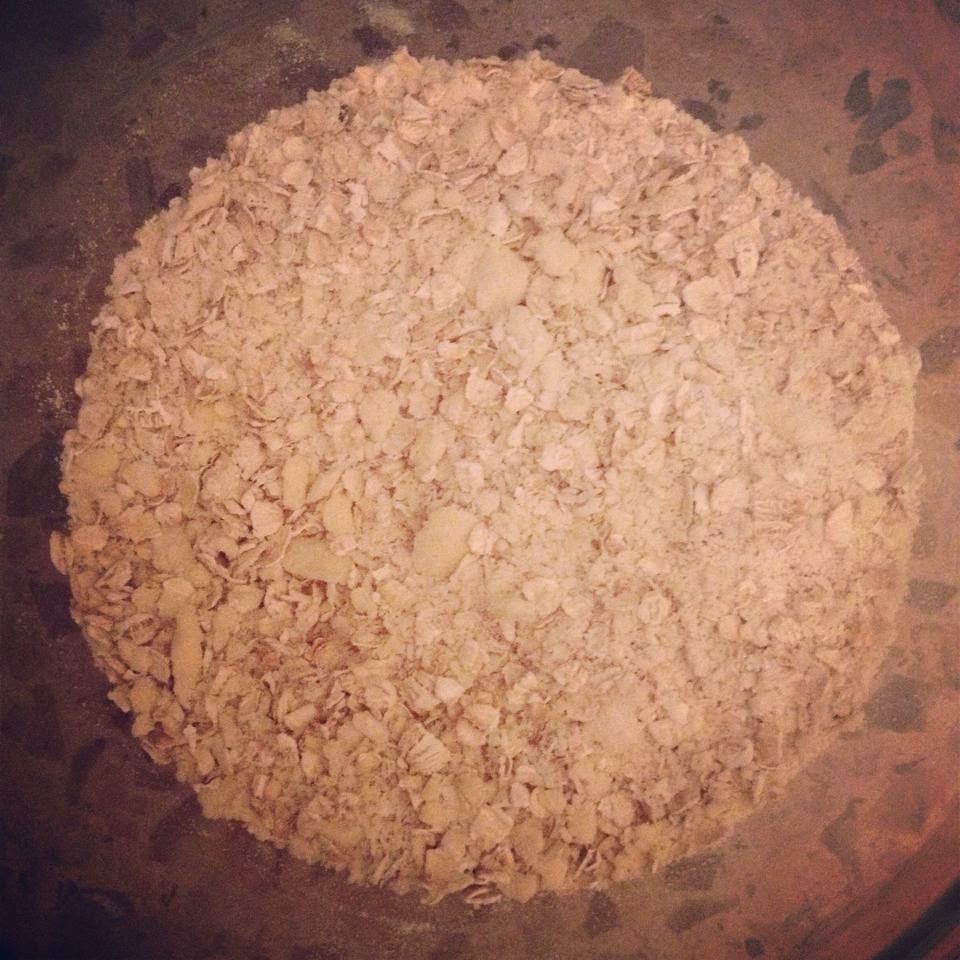
 
So this morning I was reading the news headlines, keeping up with the world beyond this house, and I read about a student from Lancashire, called Dominique, who lost her bank card on a night out this December and was offered £3 by a homeless man, called Robbie, (this was the last of his money!) to get a taxi home. Dominique didn’t take Robbie’s money but she was really touched by his offer. 

And so, soon after, Dominique started asking friends and family and so on, to each donate £3 towards raising the money to help get Robbie somewhere to live. She also slept rough for the night alongside homeless people such as Robbie, in order to raise further money for the cause. And Dominique’s raised over £20,000!! Isn’t that incredible?!

I’m so wowed by what she’s done! As my friends at uni and my family at home know, I struggle a lot with the cold at winter. Up in Newcastle, I’ve been really worried this year about the homeless people near our university library. It’s been bitterly cold and all the students trudge past them each day to go sit in a heated building, and they’re often still there when we come out at the end of the day. I don’t know how they can bear it. 

And I know there are a lot of people in need around the world, and a lot of people in need in the UK. And you can’t help everyone blah blah. And the actions of some homeless people may have contributed towards them becoming homeless blah blah. But it’s bloody awful. And I hate that I don’t have the money to buy the people hanging out around the library a cup of coffee, at least. Something warm. When I have a proper job, I’m going to try to buy a homeless person a hot drink every day in winter.

So today, in my warm home, I’ve been baking up a storm for my family. And I hope I inspire you to do some baking too! It’s good for the soul. :) But I was thinking, maybe, if you don’t have enough friends and family to feed 12 muffins to, is there someone in need that you could offer a muffin to?  Maybe you could make someone’s day by being generous beyond belief, and offering them a home baked muffin? 

Plus, if this isn’t for you (and sadly I don’t know where to find people living on the streets in Woodhouse) or you’ve been really taken up to help people in need this Christmas, there are loads of ways you can spread some magic in December! You could help out at a soup kitchen? You could spend some time with an elderly person on your road? If it snows, you could even help them to shovel their front path? You can make such a difference with your time.

Also, I found a really cool website where you can donate £5 to cover the cost of a birthday cake being baked especially for a child in Sheffield, whose family is finding it hard to provide one on their special day. Isn’t that the best idea ever? Check it out: http://www.freecakesforkidssheffield.com/

Anyway, I’ve said my piece. And I hope that, this December, some of you might be thinking about the people who don’t have lovely homes to go home to. I know I will. And I wish them all the best for getting through Christmas. 

And now I can tell you about my baking!! Today, readers, I had the itch to do some serious baking in the kitchen! But I’m really broke so I was strictly limited to the ingredients we have in the house. This is normally a big issue, but I was pleasantly surprised!! The lovely mother has come through, and stocked up for my visit home. :) In the end I decided to combine banana, apricot and chocolate… in a moment of muffin-inspired genius!
To rustle up some of your very own Chocnanicot Muffins, follow these 20 simple steps…

1.       As it’s very nearly Christmas, pour yourself a drink. Why not?

2.       Line a muffin tray with 12 muffin cases.

3.       Prep your apricots! Measure out 150 grams of them and chop them up into quarters using a sharp knife.
 

4.       Prep your bananas! Peel them both and use a fork to mash them up.

 5.       Prep your chocolate! Break it up into pieces in a bowl.

6.       Prep your cookie! Use your hands to crumble it up into tiny pieces in a bowl.

7.       Heat your oven to 180°C.


8.       Measure your marg and sugar into a large mixing bowl. Add a teaspoon of vanilla extract. Then crack your eggs into the bowl. 

9.       Stir it up!

10.   Now stir in your mashed bananas. So much goo!

11.   Place a sieve over your bowl and sift your flour and baking powder over the mix. 
 

12.   Stir it up!


13.   Add your ground almonds and your apricot chunks.
 14.   Once more, stir it up!


15.   Spoon  your mix evenly between your 12 muffin cases until they’re all mostly full.

 16.   Transport safely into the oven to bake for half an hour. Catch a show on TV!

ChefBeHere Top Tip: The ad break of your show (I was watching Friends) is the perfect time to turn your muffins around in the oven so that they’re facing a different way, just in case some are baking quicker than others.

17.   When your muffins are golden and well risen, take them out of the oven and leave to cool.

18.   After a while (and maybe another drink) stick your chocolate in the microwave to melt for a couple of minutes. Don’t let it burn, mind.

19.   Spoon your melted chocolate evenly over each muffin.

20.   Sprinkle your muffins with cookie crumble for decoration! Serve to your adoring friends and family, and then anyone else you’re feeling generous towards.


It wasn’t to be this simple for me, readers. Disaster struck on Step 18 when I burned my chocolate in the microwave. It wasn’t fit for use whatsoever, and we had no more chocolate or no icing sugar in the house. What a nightmare! However, I got inventive and managed to melt some marshmallows in the microwave, stirring hot chocolate powder into the marshmallow goo little by little, and I used this instead of melted chocolate to stick my cookie crumble on to my muffins with. Phew!


Here’s my marvelous muffins!


What do you think? Impressive, huh? I’m so proud!! Decoration is not something I normally bother with. My baking often flies straight from the oven shelves into the mouths of hungry flatmates. And it’s such a shame! I’m so glad to day that I took the time to do something on top of my muffins. Even inspite of the disaster I had in the kitchen. Because they look so pretty!

Now, I can’t yet report on how these babies taste. They’re under lock and key, being saved for pudding after our tea later. But hopefully they taste as good as they look! As I was botching various recipes together, and turning loaf recipes into muffin ones, I was a little uncertain about whether these angels would rise or not or whether they might even explode, but I hit it on the head apparently. Who knew. They domed to perfection! 

So… go! Shoo! Stop drooling over my photos and go bake your own muffins! Do it! If you don’t have the apricots you can sub in any other dried fruit. And if you’ve already overdone the chocolate this Christmas, you could drizzle glace icing over your muffins and stick a piece of dried banana on top, there’s your decoration! Let me know how this one turns out.

And remember, always, to be grateful for the kitchen you bake in.


Bake safely this Christmas amigos,


Hayley

Tuesday, 16 December 2014

PLUMBLE

Recipe: Apple and plum crumble
Time taken: 1 ¼ hours
Ingredients: 100g plain flour, 50g marg, 100g sugar, 50g oats, 4 plums and an apple

Hi readers,

Just a fleeting post today, I’m afraid. A quickie! Having slept til almost noon this morning (it’s Christmassss) and then committed to totally finishing all Christmas shopping today (ugh Christmassss) I’ve been running around like a loon! But I DID IT. I achieved! It is DONE for another year. No more. I have wrapped that shit and I’m freeee to move on. Live life again.

And yesterday, I also achieved. I got back to cooking! That’s right. I cooked! My best friend, who I haven’t seen since summer, came over for a wine at mine to catch up! It was a proper girls night in.

Me and the Besty through the years

And I cooked! I made my fabulous maple-roasted root veg to go with some Linda McCartney cheese n leek plaits, then for dessert I rustled up an apple and plum crumble! That’s right, I found ANOTHER USE FOR PLUMS!!

Me? Obsessed with plums? Nooooooo!

Here’s how to make the magic happen…

1.       Heat your oven to 180áµ’C. (I went for 200áµ’C and this was too much, I ended up with burnt patches on the top of my crumble! What a shame! I think 180áµ’C is a safer bet for you to try.)

2.       Remove the stones from your plums, then chop up your plums and apples.

ChefBeHere Top Tip: Leave the skins on your fruit! That’s where all the goodness is. :)

3.       Grease an oven proof dish with a little butter.

4.       Tip your fruit into the dish and sprinkle with a couple of tablespoons of sugar.

5.       Measure your flour, marg and 50g of your sugar into a bowl.

6.       Rub together with your fingers, until the mix looks like fine breadcrumbs.

7.       Add your oats and stir them into the crumble mix.
8.       Spoon your crumble mix over the top of your fruit, so that all the fruit is covered.

9.       Sprinkle a couple more tablespoons of sugar over the top.

10.   Bake in the oven for 45 minutes! Serve lovely n warm, with a good dollop of custard.

And here’s how apple and plum crumble looks!
(Minus burning, that was my bad)


Plums in crumble is THE BOMB! I’m telling you, readers. I already loved apple crumble and this just made it even more tastier. This was a stroke of ChefBeHereing genius! Adding plums  to this crumble doubled the fruit and doubled the greatness. This was reeeeally tasty, if I may say so. And the Besty said so, too! Plus, she’d bought red velvet cupcakes along, so we literally had the biggest bowls of pudding, all smothered in custard. There were no complaints from either of us!

Alas, readers, I’m off now to go catch up with more friends. This is such a fun time of the year. But if you have any time to spare this Christmas, why not treat your friends and family to some plum and apple crumble?? Try it out! And let me know what you think! I was really happy with how this came out (despite the burnt bits haha) and I’m definitely going to be trying plums in crumble, again sometime soon. Maybe plums with berries might work to make a really red, fruity crumble? Mmm. Or plums with another stoned fruit perhaps, like peach? Not a bad idea. So shout out any plum crumble combinations you think would be a hit, readers, and go give them a go in the kitchen!

Crumble safely this Christmas,


Hayley


Monday, 15 December 2014

BAKING UP YOUR BRAIN BERRIES

Recipe: Blueberry Muffnins

Time taken: Three quarters of an hour

Ingredients: 250g of self-raising flour, a teaspoon of baking powder, 50g of marg, 50g of sugar, 2 eggs, 250ml of milk aaaand 175g of fresh blueberries!

Hi there readers,

On our Christmas countdown… it’s only ten days to go! That’s right! Not many sleeps left at all until we’ll hear those sleigh bells jingling, readers. And things are very festive here. 

Today, the home brood braved Meadowhall shopping centre. Yes we did. We had a pretty focused raid and managed to get a shitload of gifts bought, without losing the will to live inside there. Narrowly. We went, we conquered! Cue ChefBehere war cryyyyy… ok.

So, things also progressed with my mission to eat the most indulgent foods I possibly can while home. My dad bought blueberries! Oh yeah. I literally, readers, haven’t had a blueberry since summer. This makes me so sad but it’s true. Blueberries cost outrageous amounts here in the UK, especially in winter. Factually, they’re impossible for the student to afford. Without selling blood or a major organ. Or rationing one blueberry per day. It’s heartbreaking.

So near (in every Tesco)… yet so far

But my dad loves his blueberries and SO DO I. So they’re in the hooouse! And this morning they were on my granola, too. Yum!

My berryful breakfast

Readers, if you’re in a house loaded with blueberries, I hope you’re taking full advantage of this! They’re such tasty berries and they’re really good for your skin and your heart, packed full of goodness. And the stop your brain ageing and prevent memory loss! That’s right. So people call them brain berries. :) Blueberries.  Are. Awesome.

And you can do so much with them! You can throw em on your cereal… whizz em in a smoothie … stir em up in a yoghurt… snack on em straight from the tub. OR BAKE EM UP. And they’re so good in so many recipes! Blueberry jelly, blueberry pie, blueberry scones.

OR BLUEBERRY MUFFINS! Here’s how to make this happen (the Mary Berry way)…

1.      Heat your oven to 200áµ’C.
2.       Line a muffin tray with paper cases.
3.       Measure your flour and baking powder into a mixing bowl.
4.       Add your marg and rub this in with your fingertips, until the mix turns into fine breadcrumbs.
5.       Stir in your sugar and blueberries.
6.       In a measuring jug, measure out your milk.
7.       Crack your eggs into the jug and use a fork to stir them up with the milk.
8.       Make a well in the centre of your dry mix and pour the milk mix into this well.
9.       Stir everything together into a lumpy goo!
ChefBeHere Top tip: Try not to smush your blueberries. This will make the muffins turn blue. Although, if you want blue muffins… go for it!
10.   Spoon your mix out into the paper cases so that they’re two-thirds full. The mix should stretch to make 8-12 muffins.
11.   Safely transport your muffins into the oven!
12.   Bake for 20-25 minutes until golden, well risen and firm to touch.
13.   Safely get your muffins out of the oven and either leave them to cool on a wire rack or serve them warm as a tasty treat for your flatmates, friends and family!

And that’s how it’s done! Here’s some I made earlier. :)

Note: There are only six muffins left in this picture as my flatmates were all over them! As soon as these babies left the oven they were under attack. And that’s great! I love to bake something which you can watch rise through the oven door and which fills the flat with a bakingy smell. And I always like to bake with fruit, so I’m providing some small nutrition for the girls! These muffins went really well.

Give them a go! How are yours?? Did they turn out ok? Did you leave your blueberries whole or make blue alien muffins instead? Did you get berry goo bubbling on the top of your muffins like with mine? I’ve heard some people say before that they’ve tried to make muffins like these but all their blueberries sank to the bottom and left the case soggy. This sounds terrible. Fortunately, it didn’t happen for me, did it happen for you? Does anyone know how to stop this from happening, maybe?

If you love blueberry muffins like me, share your love! If you aren’t a fan, what’s the deal? How have these gone wrong? Comment below!

I hope some of you are inspired to whip together a batch of blueberry muffins this December. Because they taste SO GOOD and blueberries really are very good for your health! And your popularity in the flat. I swear it. :D

Bake safely, readers,


Hayley


Wednesday, 10 December 2014

YULE LOVE IT

Recipe: Festive Yule Log

Time taken: 2 hours maybe (including the hour break in the middle)
Ingredients: 4 free range eggs, 100g caster sugar, 60 g self-raising flour, 40g cocoa, 600ml (a pint) of double cream), 300g dark/plain chocolate (same thing), a little icing sugar, a little butter and festive decorations.

Hi readers,
If I’m honest I’m losing track of which day of the week it is. I just had to check using the pop-up calendar in the corner of my computer screen. How ridiculous! It’s Wednesday. OBVIOUSLY it’s Wednesday. Get a grip. Somebody slap me in the face.

I think it’s so hard to even tell the day of the week because I’m so entirely surrounded by Christmas. Little else has any meaning these days. Two days ago? Geography Society Christmas Meal (which was a total blast – wine by the bottle and outrageous dancing in Flares!). Yesterday? Flat Christmas (again a blast – we carried off the cooking and had a major quiz-off). Tonight? Christmas Meal with a bunch of the geography girls to include those who couldn’t come to the official meal (at Fat Hippo – I can’t WAIT). The day after? Christmas manicure and a gig with my friend, Woody. The day after that? DRIVING HOME FOR CHRISTMAS.

So really, when measuring the days this way, it’s not shocking that I don’t know the actual day of the week. But it is still ridiculous. Anyway, yesterday I found time to make it back into the kitchen, readers! As a vegetarian, I didn’t play a major role in the Flat Christmas dinner prep. Largely, I was in charge of chopping veg here and there. And I set the table and crafted handmade placemats. AND BAKED THE YULE LOG!

That’s right! One of my flatmates took charge of Dessert Option A (bread n butter pudding) and Dessert Option B was all for me to take care of!! What a responsibility! I actually got really concerned about this. But it the end it went shockingly to plan and I managed to muddle together a pretty decent yule log, readers. I followed a Mary Berry recipe the whole way and it did me proud.

Here’s the one just for you (slightly simplified for student readers)…

1.       Heat your oven to 200˚C.

2.       Using some kitchen roll, grease a rectangular cake tine with butter.

3.       Line the tin with baking paper.
 
ChefBeHere Top Tip: I’d run out of baking paper so I used tin foil instead and, luckily, this worked fine! Maybe don’t use clingfilm though, as I imagine this melts in the oven.

4.       Crack your eggs and measure your sugar into a mixing bowl.

5.       Use an electric hand whisk to whisk these together, until the mixture is pale, light and frothy.

6.       Measure your flour and cocoa into a sieve together.

7.       Shake so that these delicately fall over your egg mix.

8.       Use a spatula to fold the flour mix into the egg mix, until they’re full incorporated and you have a chocolatey goo.
 
ChefBeHere Top Tip: Be careful when folding not to knock the air out of your mix. If you do this, it won’t rise very much in the oven. A terrible shame.

9.       Carefully pour the cake mix into your lined tin. Tip the tin around so that the mix spreads evenly to every corner.

10.   Carefully transport your tin into the oven and leave to bake for 8-10 minutes.
 
ChefBeHere Top Tip: Keep checking on your sponge and maybe switch the tin around after 5 minutes so it faces the other way, you don’t want any part of your sponge to burn!

11.   Meanwhile, lay a piece of baking paper on your work surface that is bigger than the size of the cake tin. Rather than baking paper I used foil again. And it worked again. I also hear you can use a clean tea towel.
 
12.   Use your sieve to dust icing sugar over your baking paper/replacement-item.

13.   When your cake is well risen, firm to touch, it springs back when you poke it and it’s shrinking away from the edges of the tin, take it out of the oven.

14.   Run a sharp knife around its edges, to make sure the cake isn’t stuck to the tin.

15.   Tip your tin upside down over your baking paper, so that the cake falls out onto the icing sugar below.

16.   Remove the baking paper stuck to your cake, which had been lining the cake tin.

17.   Along a long edge of your cake, use a sharp knife to core a little line along the length of the cake, an inch away from its edge.
 
ChefBeHere Top Tip: Don’t cut this bit of the cake off, just draw a line with your knife. Try not to go too deep into the cake with the knife. It should still be attached.

18.   Starting at this edge, tightly roll up the sponge with the paper inside it.

19.   Sit the roll on its outside edge and leave to cool completely (mine took an hour or so).

20.   Meanwhile, heat half of your cream in a pan.

21.   Break your chocolate up into squares.

22.   When the cream is reasonably warm, remove it from the heat and add your chocolate. Stir it all in until the chocolate is melted and you have a chocolate-coloured goo.

23.   Pour this into a bowl and leave in the fridge to cool and firm up. This will be the outer coating of your yule log.

24.   Pour the other half of the cream into a mixing bowl. Use an electric hand whisk to whip the cream.
 
ChefBeHere Top Tip: The aim here is to make your cream a solid, like squirty cream. It takes about ten minutes. You know it’s ready when the cream stands of its own accord in stiff peaks. Don’t over-whip. Keep an eye on it.

25.   Pop this in the fridge to keep cool. Go chill for a while.

26.   When your swiss roll feels TOTALLY COOL you can uncurl it and spread the whipped cream evenly over the top.
 
ChefBeHere Top Tip: I didn’t use all the cream. Some was felt over. I kept this in the fridge for eating with the yule log when it was served later in the evening. Handy.

27.   Re-roll your swiss role tightly, this time without the paper.

28.   Cover it entirely, really thickly, with the chocolate ganache topping that you have in the fridge. Coat the whole log with it.

29.   Run a fork along your yule log to make lines in the ganache, so it looks like proper bark.

30.   Cut a quarter of the length of the yule log off, diagonally not straight.

31.   Transfer your bigger piece of cake onto a serving plate or presentation board.
 
ChefBehere Top Tip: I made my own by covering a chopping board in foil.

32.   Angle your small piece next to the bigger one, so that it looks like a branch.

33.   Decorate your cake! This can mean just dusting some icing sugar on it like snow. Or I had holly and berry sprinkles to use. Or you can adorn it with fresh holly or a little plastic robin, maybe. Get creative.

And that’s it! In just 33 steps (it’s a mammoth recipe, I know) you’ve made yourself a yule log!! Well done! Here’s my baby from yesterday… part branch, part revolver...

 
Isn’t it amazing?? What do you think? I was pretty proud of my work, I have to say. And my flatmates were so lovely when they tasted it! Lots of compliments about my baking. :) It was a lovely end to a very special Flat Christmas. Eating our yule log. I wholly recommend this recipe. Mary Berry never lets me down and her yule log definitely has the X factor! Go give it a try this December. And let me know how yours come out! You’ll be fine I promise. Ready, set, BAKE!

Roll safely kids,

Hayley